
How to Add a Yandex Metrica Tag Using Google Tag Manager
If you want to track website traffic and visitor behavior with Yandex Metrica, one of the easiest ways to verify your site is through Google Search Console. This method allows you to quickly install the Yandex Metrica tag without modifying your website’s code manually.
In this step-by-step guide, you’ll learn how to:
✅ Get a Yandex Metrica tag
✅ Verify your website ownership with Google Search Console
✅ Add the Yandex Metrica tag to your site
Let’s get started!
Step 1: Sign Up for Yandex Metrica
Before adding the Yandex Metrica tag, you need an account.
- Go to Yandex Metrica.
- Sign in with your Yandex account (or create one if you don’t have it).
- Click “Create a Tag” to set up tracking for your website.
Now, you’ll need to configure your tracking tag.
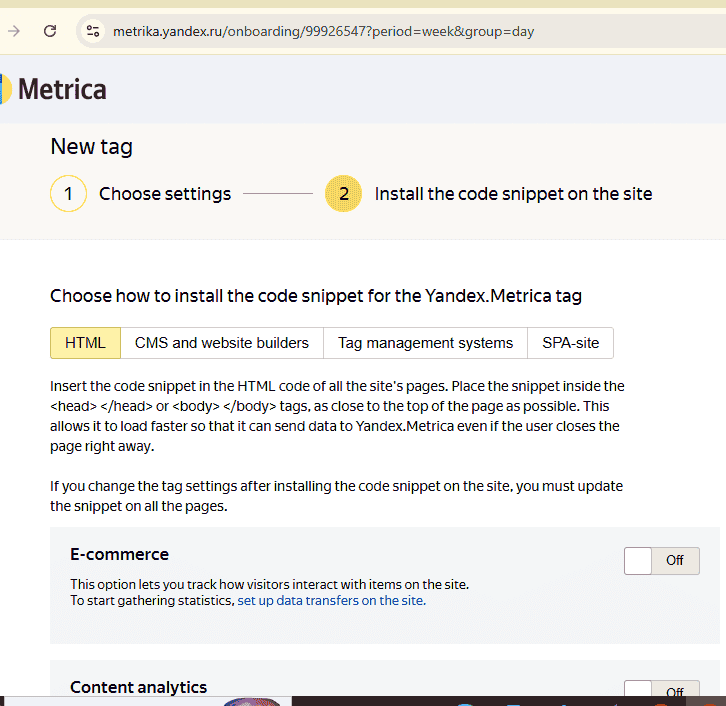
Step 2: Set Up Your Yandex Metrica Tag
Once you’re in the Create a Tag section:
- Enter your website URL in the “Site address” field.
- Give your tag a name (e.g., “My Website Tracking”).
- Click “Create tag” to generate your Yandex Metrica tag. (check at the bottom)
At this point, you will see a code snippet similar to this:
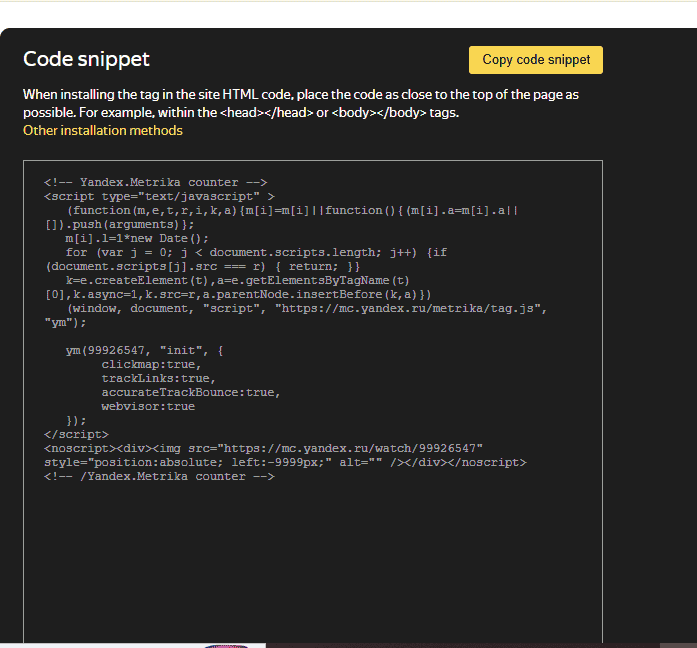
📌 Copy this tag – you’ll need it in the next steps.
Step 3: Open Google Tag Manager
Now that you have the Yandex verification tag, it’s time to add it using Google Tag Manager.
- Go to Google Tag Manager.
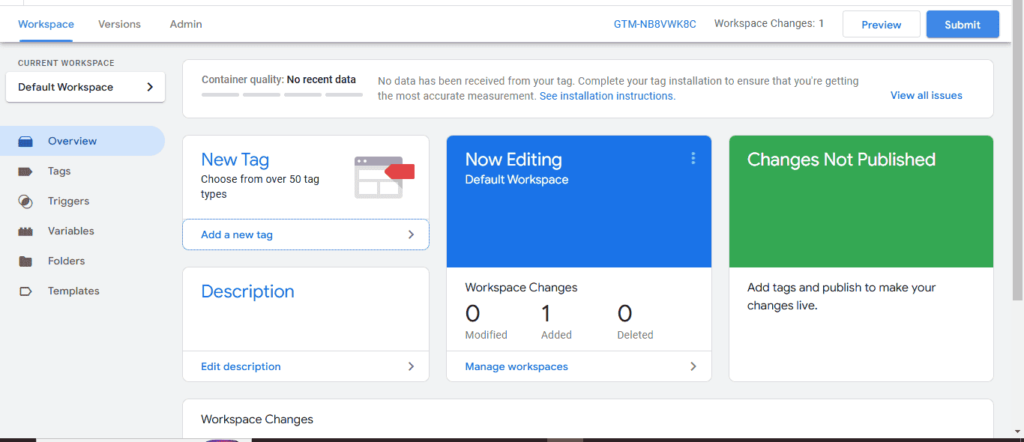
- Click on “Overview” in the left menu.
- Click on “New Tag” .
- Give your new tag a name.
- Click on Tag Configuration.
This will open a new page where you can manage tag types.
Step 4: Add the Yandex Metrica Verification Tag

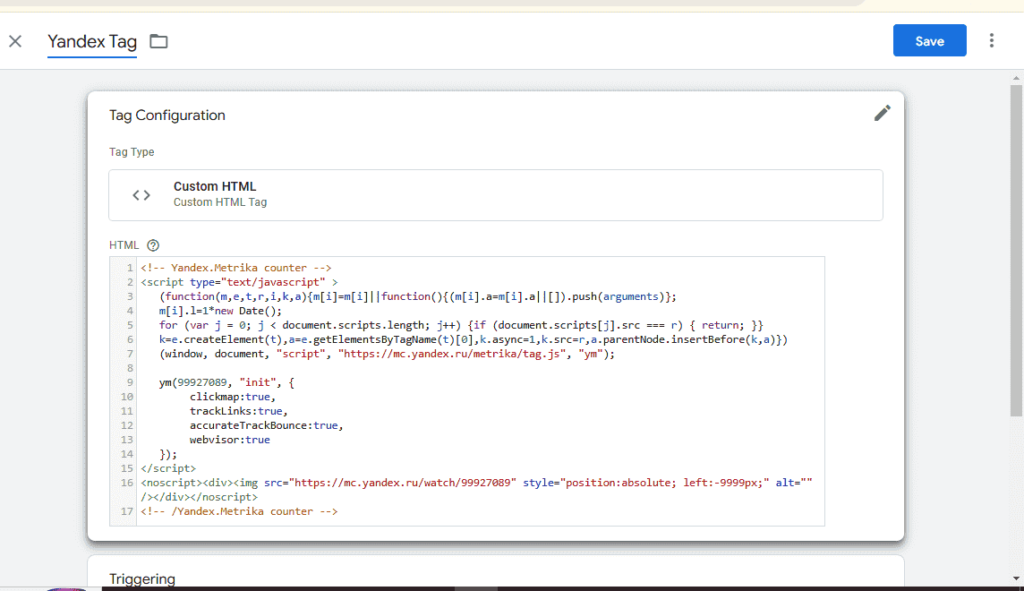
- Click “Custom HTML Tag” as a verification method (at the bottom above).
- A custom HTML tag window will pop up. Paste the code snippet generated earlier and then click at “save“.
- Thereafter click at all pages under “Triggering“.
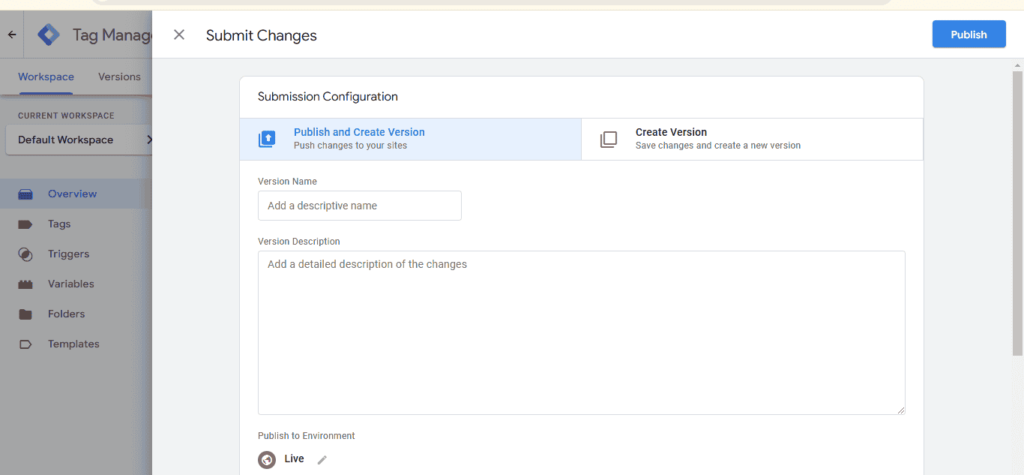
- Make sure you Save, Publish and Submit!
Step 5: Verify Your Site in Yandex Metrica
Now that you’ve added the tag, go back to Yandex Metrica and complete the verification process.
- In Yandex Metrica, go to the site you just added.
- Click “Check Verification” – Yandex will scan your site for the meta tag.
- If successful, you’ll see a confirmation message.
🚀 Your site is now verified in Yandex Metrica!
Step 6: Enable Data Tracking in Yandex Metrica
Now that your tag is installed, it’s time to activate tracking.
- In Yandex Metrica, go to Settings .
- Turn on “Goals” to track important events on your website: clicks on buttons, views of particular pages, file downloads, form submissions, and much more.
- Set up Segments according to your site needs.
- Click “Filters” if you want to source data in a specified order, leaving or removing entries in records that match specified conditions.
Step 7: Confirm Data Collection
To make sure everything is working:
- Go to Yandex Metrica Dashboard.
- Click on Reports → Real-Time Visitors.
- Open your website in another tab and browse for a few minutes.
- If the tag is installed correctly, your activity should appear in Yandex Metrica.
Final Thoughts
Adding Yandex Metrica through Google Tag Manager is an easy way to verify your website without modifying code directly.
✅ Key Takeaways:
✔ Faster verification – No need to edit website files
✔ Accurate tracking – See real-time traffic and behavior insights
✔ Google-friendly – Uses a reliable verification method
With Yandex Metrica installed, you can start tracking visitor behavior, improving your website performance, and optimizing your SEO. 🚀